
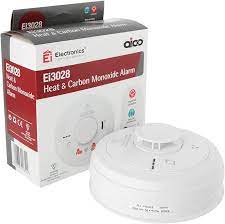
Heat and Carbon Monoxide Detector: Protecting Your Home and Loved Ones
When it comes to home safety, there are a few essential devices that every household should have. Among them, the heat and carbon monoxide (CO) detector stands out as a crucial tool for safeguarding your home and loved ones. In this article, we will explore the importance of having a heat and CO detector, how it works, and why it should be an integral part of your home safety measures.
Firstly, let’s understand the risks associated with heat and carbon monoxide. Heat-related incidents can occur due to electrical malfunctions, overheating appliances, or even house fires. These incidents can lead to property damage and pose a significant threat to human life. On the other hand, carbon monoxide is an odorless and colorless gas that is produced by burning fuels such as gas, oil, coal, or wood. Exposure to high levels of CO can be fatal or cause severe health issues.
A heat and carbon monoxide detector is designed to detect abnormal levels of both heat and CO in your home. It continuously monitors the air quality for any signs of danger. When it detects an increase in temperature or elevated levels of carbon monoxide, it triggers an alarm to alert you immediately.
Installing a heat and CO detector offers several benefits. Firstly, it provides early warning signs in case of fire outbreaks or dangerous levels of CO in your home. This early detection allows you to take immediate action by evacuating safely or calling emergency services promptly.
Furthermore, having a heat and CO detector brings peace of mind. You can rest assured that you have an extra layer of protection against potential hazards within your home environment. It acts as a vigilant guardian while you sleep or when you are away from home.
When choosing a heat and CO detector for your home, there are a few factors to consider. Look for detectors that meet industry standards and carry certifications, such as the British Standard (BS EN 50291) for CO detectors. Ensure that the detector has a loud and distinct alarm sound to wake you up or alert you even from a distance. Additionally, consider models that come with a digital display to provide real-time information about temperature and CO levels.
Remember, installing a heat and CO detector is not enough; regular maintenance is essential. Test your detector monthly to ensure it is functioning correctly and replace batteries at least once a year. It’s also crucial to keep the detector clean from dust or debris that may interfere with its sensors.
In conclusion, a heat and carbon monoxide detector is an indispensable device for every home. Its ability to detect abnormal heat levels and dangerous carbon monoxide concentrations can save lives and prevent property damage. By installing one in your home, you are taking a proactive step towards creating a safer living environment for yourself and your loved ones. Invest in this vital safety tool today and enjoy the peace of mind it brings knowing that you have taken measures to protect what matters most.
6 Essential Tips for Heat and Carbon Monoxide Detector Safety
- Install multiple detectors
- Follow manufacturer’s instructions
- Test regularly
- Replace batteries annually
- Keep them clean
- Know when to replace them
Install multiple detectors
Install Multiple Detectors: Enhancing Safety with Redundancy
When it comes to home safety, redundancy is key. One crucial tip to maximize the effectiveness of your heat and carbon monoxide (CO) detectors is to install multiple units throughout your home. In this article, we will explore why having multiple detectors is important and how it can enhance the safety of your household.
Having a single heat and CO detector in your home is undoubtedly beneficial. It provides an extra layer of protection by alerting you to potential fire outbreaks or dangerous levels of carbon monoxide. However, relying solely on one device may have limitations, especially in larger homes or multi-story buildings.
By installing multiple detectors, you ensure that every area of your home is covered. Different areas may have varying levels of heat or CO concentration due to factors such as ventilation or proximity to potential sources. Placing detectors strategically throughout your home helps to detect any abnormal conditions more accurately and promptly.
Consider placing a detector in each bedroom, living room, kitchen, basement, and any other areas where combustion appliances are present. This comprehensive coverage ensures that no matter where you are in your home, you will be alerted immediately if there’s a threat.
Another advantage of installing multiple detectors is that they can communicate with each other. Some models are designed with interconnected capabilities, meaning that when one detector detects danger and triggers an alarm, all the interconnected units will sound simultaneously. This feature ensures that everyone in the household can hear the alarm regardless of their location within the property.
Additionally, having multiple detectors provides redundancy in case one unit malfunctions or loses power. By relying on a single detector, there’s always a risk that it may fail at a critical moment. Having backups ensures that even if one unit fails for any reason, there are others ready to take over and provide continuous protection.
Remember that installing multiple detectors doesn’t mean neglecting maintenance. Regularly test all units to ensure they are functioning correctly and replace batteries as needed. Keep in mind that interconnected units may require professional installation to ensure proper wiring and communication between devices.
In conclusion, installing multiple heat and carbon monoxide detectors in your home is a wise decision to enhance safety. By strategically placing them throughout your property, you increase the chances of early detection and timely response in case of fire outbreaks or CO incidents. Take advantage of interconnected models to ensure everyone in your household can hear the alarm regardless of their location. Invest in redundancy today and enjoy the peace of mind that comes with knowing you have taken every measure to protect your home and loved ones.
Follow manufacturer’s instructions
When it comes to ensuring the effectiveness and reliability of your heat and carbon monoxide (CO) detector, one essential tip stands out above all: follow the manufacturer’s instructions.
Manufacturers provide detailed instructions on how to properly install, use, and maintain their detectors. These instructions are designed to maximize the device’s performance and ensure accurate detection of heat and CO levels in your home.
By carefully reading and adhering to the manufacturer’s instructions, you can guarantee that your detector is installed correctly in a suitable location. This is crucial because improper installation can lead to false alarms or even failure to detect potential dangers.
Additionally, manufacturers often provide specific guidelines for testing your detector regularly. Regular testing ensures that the device is functioning correctly and that its alarm system is effectively notifying you of any hazardous situations. Following these guidelines will help you establish a routine for testing your detector, giving you peace of mind that it is always ready to protect you.
Moreover, manufacturers may offer recommendations on maintenance procedures such as battery replacement or cleaning. By following these guidelines, you can ensure that your detector remains in optimal condition throughout its lifespan.
Remember, each heat and CO detector may have unique features or requirements specified by the manufacturer. Therefore, it is crucial not to assume that all detectors operate in the same way. Take the time to familiarize yourself with the specific instructions provided for your particular model.
In conclusion, following the manufacturer’s instructions is a fundamental tip when it comes to using a heat and carbon monoxide detector effectively. By doing so, you can maximize its performance, reduce false alarms, and ensure that it continues to protect your home and loved ones reliably. Take a few moments to read through the instructions provided by the manufacturer – it’s a small effort that can make a big difference in keeping your home safe from potential hazards.
Test regularly
Regular Testing: Ensuring the Reliability of Your Heat and Carbon Monoxide Detector
When it comes to the safety of your home and loved ones, having a heat and carbon monoxide (CO) detector is a crucial step. However, simply installing this life-saving device is not enough. Regular testing is essential to ensure its reliability and effectiveness.
Testing your heat and CO detector should be a routine part of your home maintenance. By doing so, you can verify that the device is in proper working order and capable of detecting any potential hazards in your home environment.
To test your detector, follow these simple steps:
- Familiarize yourself with the manufacturer’s instructions: Each detector may have specific guidelines for testing. Take a few minutes to read through the user manual to understand the recommended testing procedure.
- Locate the test button: Most heat and CO detectors come equipped with a test button. This button is designed to simulate an alarm condition without actually triggering an emergency response.
- Press and hold the test button: Gently press and hold the test button for a few seconds until you hear the alarm sound. This will allow you to verify that both the audio and visual indicators are functioning correctly.
- Check for adequate sound: Ensure that the alarm sound is loud enough to be heard throughout your home, even from distant rooms or when you are asleep. If you find that it’s not audible in certain areas, consider installing additional detectors for comprehensive coverage.
- Reset after testing: Once you have completed the test, reset your detector as per the manufacturer’s instructions. This will ensure that it returns to its normal operational state.
By conducting regular tests on your heat and CO detector, you can have peace of mind knowing that it’s ready to alert you in case of any potential danger. It’s recommended to perform this test at least once a month or as advised by the manufacturer.
In addition to regular testing, it’s crucial to keep your detector clean and free from dust or debris that may interfere with its sensors. Regularly inspect and wipe down the device to maintain its optimal performance.
Remember, testing your heat and CO detector is a simple yet vital task that can make a significant difference in ensuring the safety of your home. By incorporating this routine into your home maintenance schedule, you are taking proactive steps towards protecting yourself and your loved ones from potential hazards. Stay vigilant, stay safe!
Replace batteries annually
Replacing Batteries Annually: Ensuring the Effectiveness of Your Heat and Carbon Monoxide Detector
When it comes to home safety, staying proactive is key. One important aspect of maintaining a reliable heat and carbon monoxide (CO) detector is to replace its batteries annually. This simple yet crucial tip ensures that your detector remains in optimal working condition, ready to protect you and your loved ones from potential dangers.
Why is it essential to replace the batteries in your heat and CO detector regularly? Well, batteries provide the necessary power for the device to function properly. Over time, batteries can lose their charge, resulting in reduced sensitivity or even complete failure of the detector. By replacing the batteries annually, you can ensure that your detector remains fully operational and continues to provide accurate readings and timely alerts.
An annual battery replacement routine is easy to incorporate into your home maintenance schedule. Choose a specific date each year, such as during daylight saving time changes or on a significant occasion like New Year’s Day or your birthday. Mark it on your calendar or set a reminder on your phone to prompt you when it’s time for battery replacement.
To replace the batteries in your heat and CO detector, follow these simple steps:
- Check the user manual: Refer to the user manual provided with your specific model of detector for guidance on battery replacement. It will provide detailed instructions tailored to your device.
- Prepare new batteries: Make sure you have fresh batteries available that are compatible with your detector. Consider using long-lasting lithium or alkaline batteries for extended performance.
- Power off the device: Before removing old batteries, turn off the power switch on the detector if applicable. This prevents any false alarms during battery replacement.
- Remove old batteries: Open the battery compartment of your detector following the instructions in the user manual. Carefully remove the old batteries, ensuring proper disposal according to local regulations.
- Insert new batteries: Insert fresh batteries into the compartment, following the correct polarity (+/-) indicated. Ensure they are securely in place.
- Test the detector: After replacing the batteries, conduct a quick test to ensure that the detector is functioning correctly. Press the test button or follow the instructions in your user manual to activate a test alarm. If you encounter any issues, refer to troubleshooting tips in the manual or contact customer support.
By replacing your heat and CO detector’s batteries annually, you are taking an important step towards maintaining its effectiveness and reliability. This small act can make a significant difference in keeping your home safe from potential fire hazards and carbon monoxide exposure.
Remember, regular battery replacement is just one aspect of maintaining your heat and CO detector. It’s also essential to regularly test the device according to manufacturer recommendations and keep it clean from dust or debris that may interfere with its sensors.
Investing a few minutes each year to replace your heat and CO detector’s batteries ensures that it remains ready to protect you and your loved ones effectively. Prioritize home safety by making this simple task an annual habit, providing yourself with peace of mind knowing that you have taken proactive measures to safeguard your home environment.
Keep them clean
When it comes to ensuring the effectiveness of your heat and carbon monoxide (CO) detector, one simple yet vital tip is to keep them clean. Regular cleaning and maintenance of your detectors can significantly impact their performance and reliability.
Dust, dirt, and debris can accumulate on the sensors of your detectors over time. This buildup can interfere with their ability to detect heat or carbon monoxide accurately. Therefore, it is essential to clean them periodically to maintain their efficiency.
Start by gently removing the detector from its mounting bracket or wall. Check the manufacturer’s instructions for specific cleaning guidelines as different models may have varying requirements. In general, you can use a soft cloth or brush to wipe away any visible dust or dirt from the exterior of the device.
Pay close attention to the sensors, as they are responsible for detecting heat or CO levels. Use a clean cloth or cotton swab lightly dampened with water (or a mild household cleaner specified by the manufacturer) to carefully wipe the sensors. Be cautious not to apply excessive force or moisture that could damage the device.
Once you have cleaned the exterior and sensors, allow them to dry completely before reassembling and reinstalling the detector in its designated location. Remember to follow any additional instructions provided by the manufacturer regarding drying times or specific cleaning products.
Regularly scheduled cleaning sessions are crucial for maintaining optimal performance. Aim to clean your heat and CO detectors at least once every six months, although more frequent cleaning may be necessary if you live in an environment prone to dust or other contaminants.
In addition to regular cleaning, it is equally important to test your detectors regularly according to the manufacturer’s recommendations. Testing ensures that they are functioning correctly and that their alarms are loud enough for you to hear in case of an emergency.
By keeping your heat and carbon monoxide detectors clean, you are taking proactive steps towards maintaining their accuracy and reliability. This simple maintenance routine enhances their ability to detect potential dangers effectively, providing you and your loved ones with the utmost protection and peace of mind.
Remember, a clean detector is a reliable detector. Take the time to clean and maintain your heat and CO detectors regularly, as it is an investment in the safety and well-being of your home and family.
Know when to replace them
Knowing When to Replace Your Heat and Carbon Monoxide Detector
Having a heat and carbon monoxide (CO) detector in your home is an essential safety measure. However, it’s important to remember that these devices have a lifespan and need to be replaced periodically to ensure their effectiveness. In this article, we will discuss the importance of knowing when to replace your heat and CO detector and how to stay vigilant about your home’s safety.
The lifespan of a heat and CO detector can vary depending on the manufacturer, model, and type of device. Generally, it is recommended to replace them every 5-7 years. Over time, the sensors in these detectors may become less sensitive or may no longer function optimally. Regularly replacing them ensures that you have reliable equipment that can accurately detect any potential hazards.
Aside from the recommended replacement timeframe, there are other signs that indicate it’s time for a new heat and CO detector. If your device starts producing false alarms frequently or fails to trigger an alarm during tests, it may be a sign of sensor deterioration. Additionally, if you notice any physical damage, such as cracks or corrosion on the device, it’s crucial to replace it immediately.
It’s also important to note that advancements in technology lead to improved detection capabilities over time. Newer models may offer enhanced features such as digital displays for real-time information or connectivity options for remote monitoring via smartphone apps. Upgrading your detector allows you to benefit from these advancements and stay up-to-date with the latest safety standards.
To ensure your home remains protected at all times, here are some tips for staying vigilant about your heat and CO detector:
- Regularly test your detector: Perform monthly tests by pressing the test button on your device. This ensures that the alarm sound is loud enough and can be heard throughout your home.
- Replace batteries annually: Even if your detector is hardwired or comes with long-life batteries, it’s still important to replace the batteries at least once a year. This ensures that your detector remains operational during power outages.
- Keep detectors clean and free from obstructions: Dust or debris can interfere with the sensors in your detector. Regularly clean them using a soft cloth or vacuum cleaner to maintain their effectiveness.
- Stay informed about product recalls: Manufacturers occasionally issue recalls for certain models due to safety concerns. Stay updated with any recalls and follow the manufacturer’s instructions for replacement if necessary.
By being aware of when to replace your heat and CO detector and following these tips, you can ensure that your home remains protected against potential hazards. Remember, investing in a new detector is an investment in your safety and the well-being of your loved ones. Prioritize regular maintenance and stay proactive in maintaining a safe living environment for all.